
How to Replace Shower Valve Cartridge
After a tiring day at work, exercising, or working out at the gym, taking a shower under the soothing warm water is one of the most relaxing things. Unfortunately, suppose the shower valve leaks, seized, or breaks. In that case, it can ruin your plan and cause stress, particularly if your home has only one available shower. Fortunately, in most cases, a malfunctioning shower valve can be repaired by replacing the shower valve cartridge, which contains the valve’s interior components, while the exterior valve assembly can remain in place. However, if the exterior valve assembly and the pipes leading to the valve show signs of significant rusting and corrosion, it may be necessary to contact a professional plumber to inspect the damage’s source and replace Shower Valve Cartridge or the entire valve.
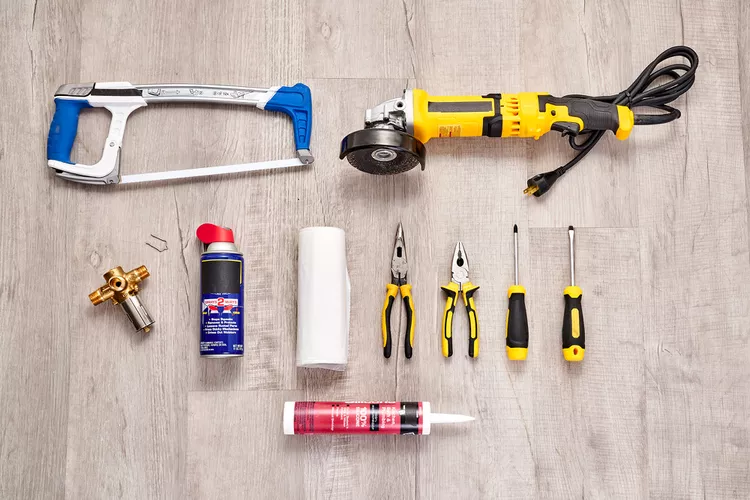
What You’ll Need
| Tools/Equipment | Materials |
| Screwdriver set | Shower valve |
| Hack saw | Paper towel |
| Needle-nose pliers | Caulk |
| Drop cloth | WD40 |
| Standard pliers | Retainer clip |
| Angle grinder |
Before Starting
Identify the specific size and type of shower valve cartridge required for a replacement since there may be differences in stems and splines between different brands. Generally, individuals can determine the right part by identifying the shower valve brand and consulting the manufacturer’s website to locate the correct cartridge.
If the brand is unknown, the shower valve cartridge may need to be removed and taken to a local home improvement store for the suitable replacement. During this process, the water supply to the shower must be turned off to prevent water damage.
Instructions
Lay a Protective Cover in the Shower Bottom
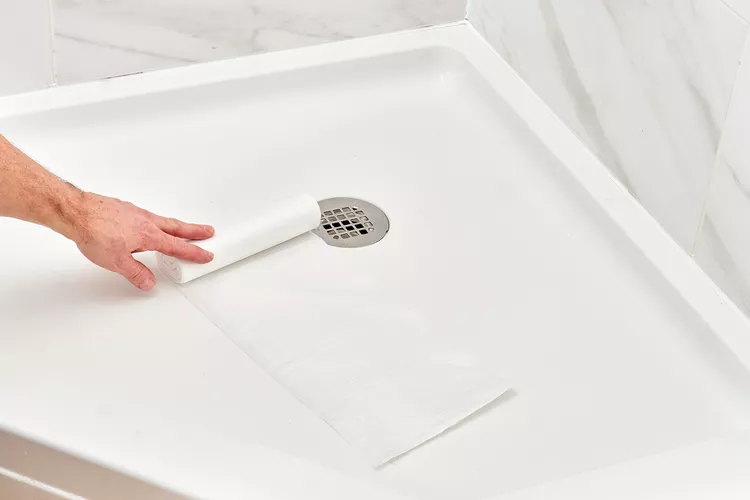
It’s necessary to put a protective cover in the shower or bathtub to seal off the drain. This serves the dual purpose of preventing small parts like screws, washers, and others from slipping down the drain and keeping the area neat and tidy.
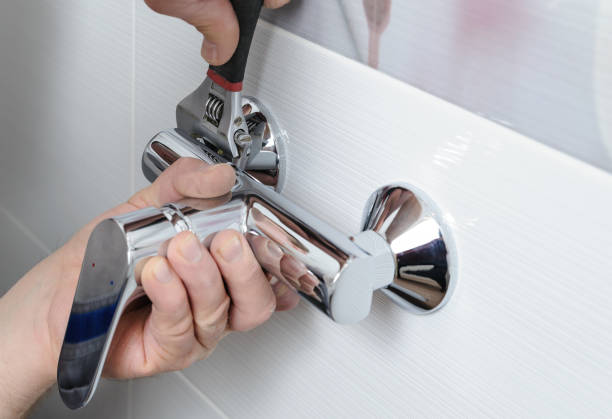
Detach the Shower Handle
In order to get to the shower valve, the handle or handles need to be detached. If the shower has a single lever handle, such as a Valley shower, look for a small Allen wrench removable set screw in the handle. Plastic, glass, or faux-crystal decorative handles often have a small plastic cover over the set screw. Use a flat-head screwdriver to remove the cover to locate the screw.
Similarly, two-handle showers usually have screws hidden by plastic covers on the front of each handle. Remove the covers to get to the screws. After identifying the set screws, loosen them with a screwdriver or Allen wrench and detach the handle. Be sure to keep track of the set screws and shower handle.
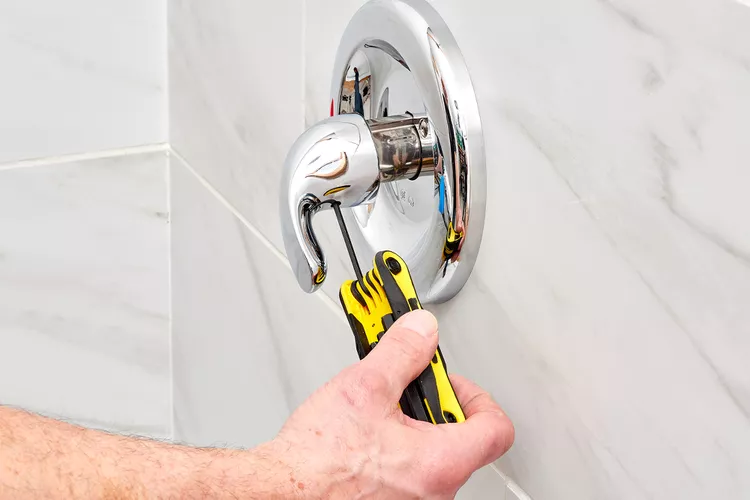
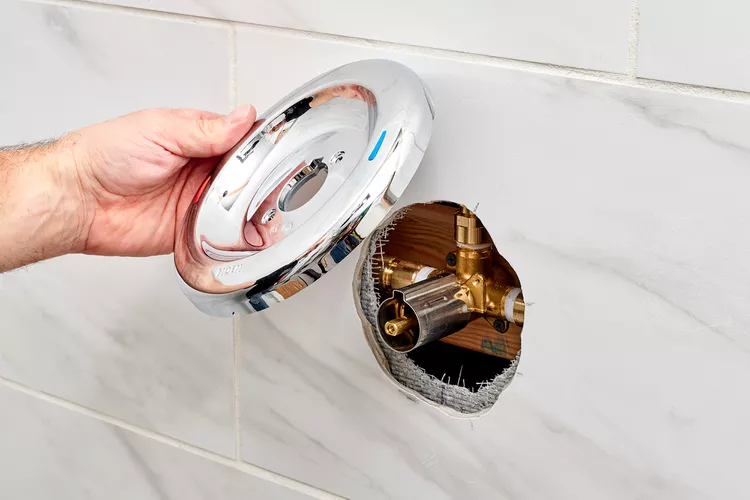
Unscrew and Clean the Trim Plate
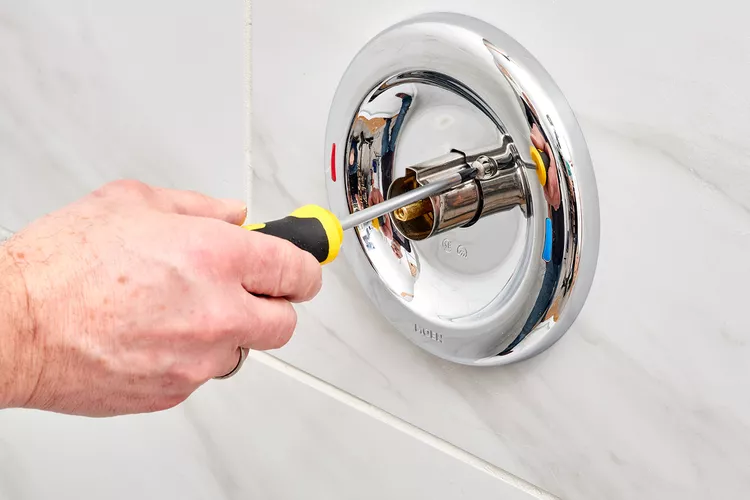
The trim plate is the flat backing situated behind the handle. Its aim is to conceal the shower valve assembly and the opening in the shower wall to prevent water from seeping through the space between the walls, which could cause severe damage to the home. To extract the trim plate, use a screwdriver to loosen the screws that secure it to the valve assembly, then remove it from the valve stem.
Keep the screws in mind, and take the time to scrape off old caulking and clean the trim plate and the shower handle. In some cases, after the handle is removed, the shower valve cartridge can be fully accessed. This implies that in such cases, the trim plate does not need to be removed to replace the shower valve cartridge.
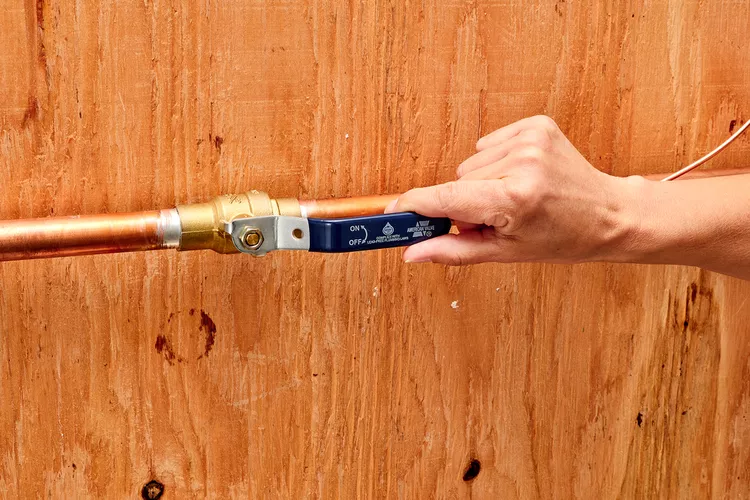
Turn Off the Water
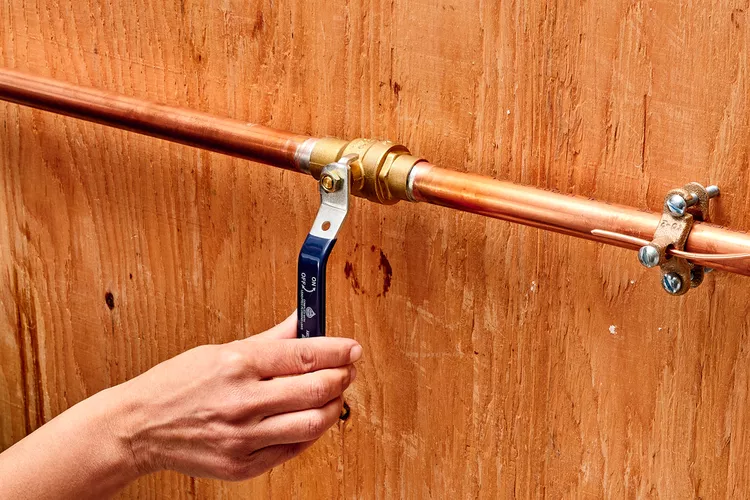
Locate the water stops on either side of the shower valve cartridge and turn them off with a screwdriver. This will isolate the shower valve from the rest of the water in the home. If the water stops cannot be located, turn off the water to the entire home using the main shut-off valve. Make sure to turn on a nearby faucet to release the pressure and drain the water line after turning off the water to the home.
Inspect and Prepare the Area
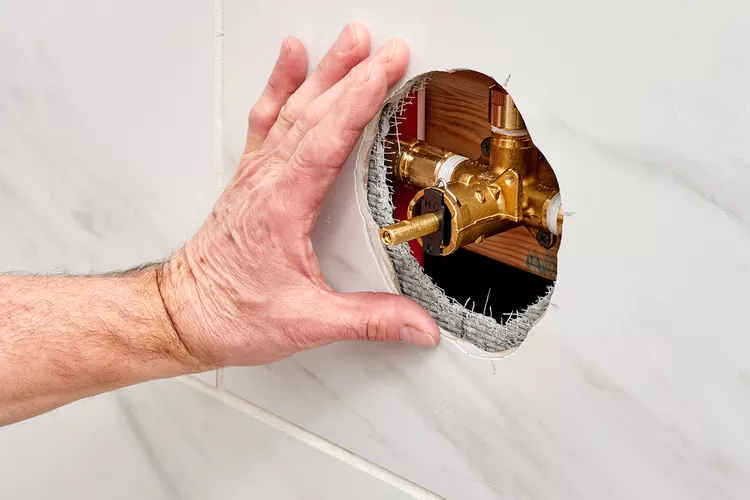
Compare the size of the existing hole in the shower wall with the size of the shower valve. If the hole is too small, use a hack saw or an angle grinder to cut the tiles and increase the size of the hole. Ensure that the hole is still small enough to fit entirely behind the trim plate. Suppose the shower valve cartridge, water stops, and the retainer clip at the top of the cartridge can be accessed freely. In that case, there is no need to expand the hole.
Remove the Retainer Clip
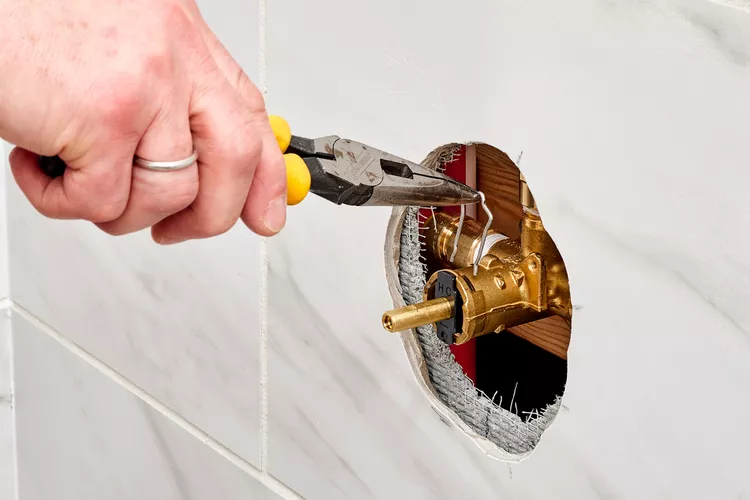
Using a set of needle-nose pliers, grip the retainer clip and pull it up and out of the shower valve to remove it. If the retainer clip is in good condition, it can be reused. However, most new shower valve cartridges come with a new retainer clip.
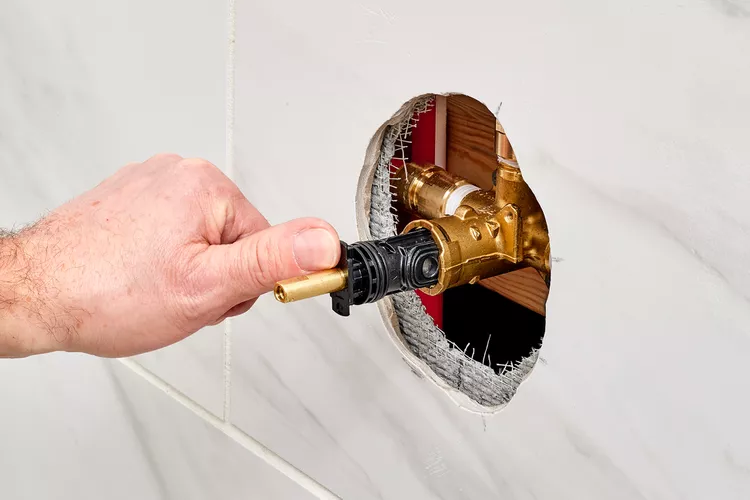
Pull Out the Shower Valve Cartridge
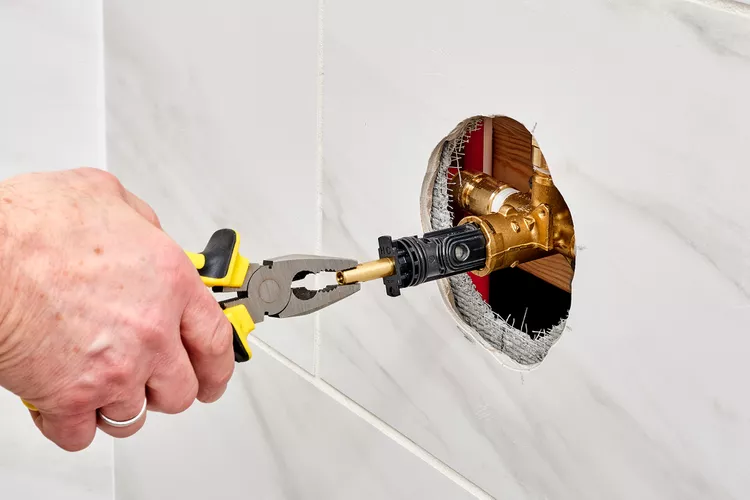
Use standard pliers to grip the shower valve stem and slowly pull the cartridge out of the shower valve assembly. If the cartridge is stuck, use a lubricating solution or try wiggling it back and forth as well as up and down to loosen the cartridge. Inspect the shower valve assembly after removing the cartridge to ensure it’s in good condition.
Install the New Shower Valve Cartridge
Slide the new shower valve cartridge into the assembly if it’s the correct replacement part. Use the new or the old retainer clip to secure the cartridge.
Turn on the Water and Test for Leaks
Turn on the water to the house or use the water stops to test for leaks in the shower valve. Use a paper towel to wipe down the valve assembly to ensure it’s completely dry, then wait a few minutes before wiping it again. Paper towels are a great leak detector because they clearly display even a drop of water.
Reattach the Trim Plate and Shower Handle
Slide the trim plate over the stem of the shower valve and secure it with screws. Secure the handle or handles with set screws. Test the shower handle to see if it properly controls the flow and temperature of the water. Apply new caulking around the trim plate to prevent water from seeping behind the shower wall. Clean up any debris and drop cloth.
Replacing a Shower Cartridge: DIY or Hire a Professional?
If you lack plumbing experience, replacing a shower cartridge alone can be quite challenging. However, doing it yourself can save you money, with replacement parts starting at around $50. In contrast, hiring a professional plumber to replace the cartridge will cost you between $200 and $400, including parts and labor.
If you are not afraid to follow the instructions carefully, there is no need to worry about damaging your shower, making it a feasible DIY project. It’s an excellent opportunity to challenge yourself!
If you are still struggling but prefer not to hire a plumber, consider seeking assistance from a local handyman to fix your shower faucet issues. This approach can also help you save some money.
Conclusion
In conclusion, replacing a shower valve can seem like a daunting task, but with the right tools and instructions, it is a manageable DIY project that can save homeowners hundreds of dollars in plumber fees. Following the steps outlined above, anyone can learn how to remove and install a new shower valve cartridge, ensuring that their shower runs smoothly and efficiently for years to come.
People May Also Ask
Can I replace the shower valve myself?
Yes, you can replace the shower valve yourself, but it can be difficult if you don’t have plumbing knowledge. However, doing it yourself can save you money, as the parts to replace the shower valves start at around $50.
How do I know if my shower cartridge could be better?
If you’re undergoing problems with water temperature, pressure, or leaking, your shower valve may be bad. Check for a buildup of mineral deposits or corrosion on the valve. This can also be a sign that it needs replacing.
How do you remove a shower valve cartridge?
To replace shower valve cartridge, turn off the water supply and drain the water line, check and prepare the area, remove the retainer clip, and then pull out the shower valve cartridge using pliers. If the cartridge is stuck, consider using a lubricating solution or wiggling it back and forth to loosen it.
How do you install a shower valve cartridge?
To install a shower valve cartridge, ensure the shower valve assembly is in good condition. Then, slide the new cartridge into the valve assembly and secure it with the retainer clip. Turn on the water and test for leaks before reattaching the trim plate and shower handle and applying new caulking around the trim plate to prevent water from seeping behind the shower wall.
Related Articles
- How to Replace Shower Valve Cartridge
- Life Hacks For Home: Best or Bestest You Decide
- Build Your Own Ravishing Basement Bar
- House Painting Tips That You Must Follow Before Painting Your Walls Or Ceilings
- The Ever-Persisting Problem of Garbage Disposal Leaking: All Sorted
- What to Do When a Tree Falls on Your House
- What is a Bonded, Insured, and Licensed Contractor?
- How to keep Staining Cedar Wood Colorful and Protected
- Board and Batten: Everything You Need to Know
- How to repair a roof? The Perfect Guide To repair Your Roof


